Sewing Instructions for the Bunny/Monster mittens:
Some things:
All cut pattern pieces from step one (previous posting)
Sharp scissors
pins
thread to match your fabric
Something pointy like a chopstick to help turn things to the right side
All cut pattern pieces from step one (previous posting)
Sharp scissors
pins
thread to match your fabric
Something pointy like a chopstick to help turn things to the right side
 Pin and then sew together the mitten wrist lowers with the palm pieces right sides together following the dotted lines. I used a one eighth inch seam allowance, almost the same width as my presser foot. Make sure you have a left and a right hand before you sew by laying them out as I have.
 Cut a little slit into both layers right up to the stitching line in the areas I have marked blue in this picture.
 With right sides together and making sure once again you have a left and a right hand, pin and stitch along the yellow line again using a one quarter inch seam allowance. Fold the thumbs in and up out of the way. The slits you cut should make sewing over the thumb area easier.
 Turn the outside, or colourful part of the mitten right side out, and then put your hand in the lining (keep it wrong side out). Push the lining into the outside mitten with your hand inside.
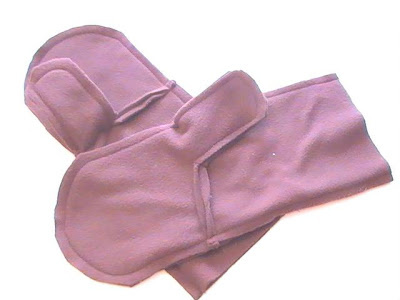
 This is where we are. You should have what looks and feels like the warmest softest mitties ever. The bottoms just need to be stitched together. That'll come later, don't worry!
 For the ears you will need to pile a felt piece onto each of the fleece pieces right sides together. Pin and sew around each ear using a quarter inch seam allowance and leaving the bottom flat side of the ear open.
(They look like they are different sizes here, but the aren't. I think it's an angle thing. All the ear pieces should be the same size and shape.)
 Trim away extra seam allowance very carefully using sharp scissors. Don't cut up to or through the stitching, take your time. You want the smallest seam allowance left. It should be about one sixteenth on an inch after trimming.


No comments:
Post a Comment